Week One: Monday, Jan. 9th - Sunday, Jan.15th
- Nicholas Neff
- Jan 9, 2023
- 3 min read
Updated: Feb 8, 2023
Monday, Jan. 9th:
On Monday, we got assigned with our first project. We are given a library of images to chose from, and then we will learn how to get a scene set up to match the lighting. For now, I have a kit that Bridget gave to me for taking my own photography if I want to create my own clean plate.
Tuesday, Jan. 10th:
After looking through the photos, I have decided that I like Hollar, Shelton, and Evie - Fence. Listed below are the photos that I have in mind, as I'm going to bring these choices into class for further discussion:
Wednesday, Jan. 11th:
On Wednesday, Bridget brought five cameras and five camera stands for all of us in class to try out. We went over all the functions of the camera, setting up the equipment, and getting us more familiar with all of the features of the camera. We learned about aperture, exposure, and ISO in the camera, and using the histography to get a great balance of low and high values. We got a good understanding of white balancing as well and its impact on the final picture. Different white balance settings were on the camera for us to explore and understand, and we learned about the effects of setting a camera's white balance color to orange, leading to the entire picture through the lens turning everything into a purple tint.
Friday, Jan. 13th:
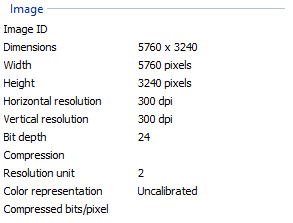
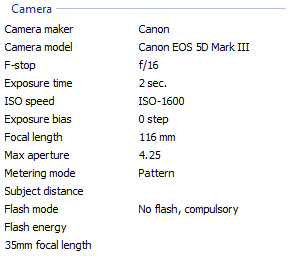
On Friday, I got back to work on this project, lining up the cube in my scene with the cube in the photo. My first step was going through Dropbox to grab the photos needed, then looking at the metadata in my reference photo to find the camera type, focal length, and dimensions of the photo. After finding this information, I relate this back to the camera in Maya.
After setting up my scene settings, I fit the image to be in the resolution gate and got started on getting a cube to line up with the cube in my reference. When creating the cube in Maya to reference the cube in the photo, I made the cube the same size as the cube in the reference (4"x4"x4"). Changing the grid in Maya to be in inches instead of centimeters helps as well. You can change this in the settings window under this path: Windows > Preferences > Settings > Working units. When the cube was to size correctly, I started moving my camera to be extremely close to where the cube is in my reference photo.

After aligning the cube, I wanted to make sure my preferences were set correctly for the rest of the project. Going into my preferences, I changed the Preferred Render Setup System to Legacy Render Layers instead of the default render set up. Then, I went to my Color Management section in Preferences and did more tweaking there. I checked the box to "Enable Color Management", changed my render space to be "ACEScg", changed the view transform to "sRGB Gamma" and in the Output Color Transform Preferences, I checked the box to "Apply Output Transform to Renderer." With all this set, my render layers will be in order, and my colors for the final look will be correct.
Now, I'm going to create the HDR image for the project for lighting using Photoshop. The HDR image will help me create lighting in my scene to illuminate it exactly how the reference scenes lighting was. The first step to getting this HDR is gathering my photos with different exposures together for Photoshop. There were seven levels of the exposures shot, and I combined them together using "Merge to HDR Pro" from this path: File > Automate > Merge to HDR Pro. When Photoshop was done putting the photos together, I checked off the option for "Remove Ghosts" and set the mode to 32 bit color depth to check off the option for "Complete Toning for Adobe Camera Raw".


Comments